If you grew up loving those strawberry shortcake ice cream bars, get ready for a slice of sweet nostalgia. This Strawberry Crunch Cheesecake takes everything you loved about that classic flavor and transforms it into a creamy, no-bake dessert that’s both impressive and effortless.
With a buttery crust, silky cheesecake center, and a golden strawberry crumble topping, this treat brings together flavor and texture in all the right ways. No oven, no water bath, no hassle just mix, chill, and top with that iconic crunch. Perfect for birthdays, BBQs, potlucks, or whenever you want a dessert that looks as good as it tastes.
Simple to make and endlessly craveable, this cheesecake is guaranteed to become a go-to favorite in your recipe box.
What is Strawberry Crunch Cheesecake?
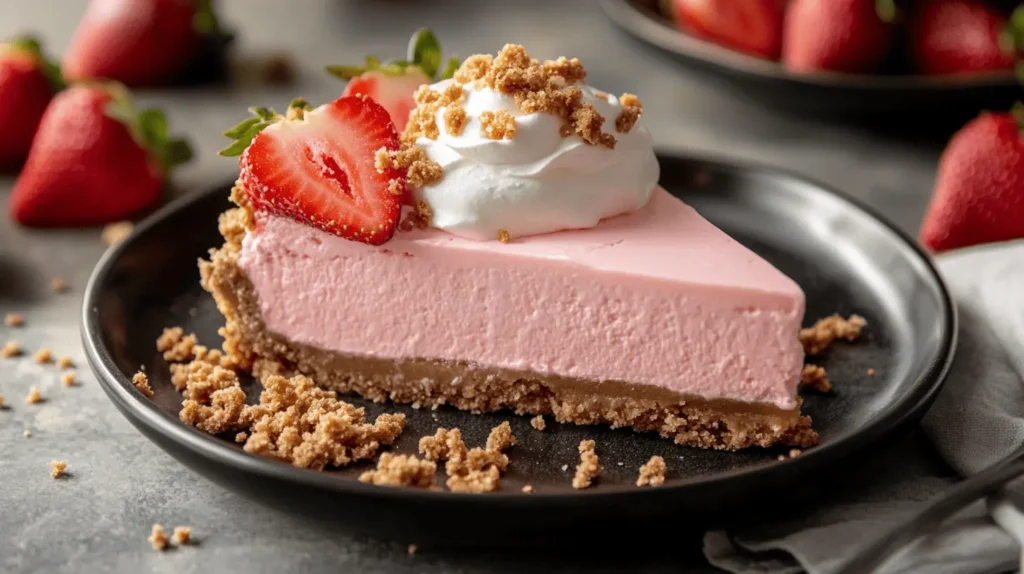
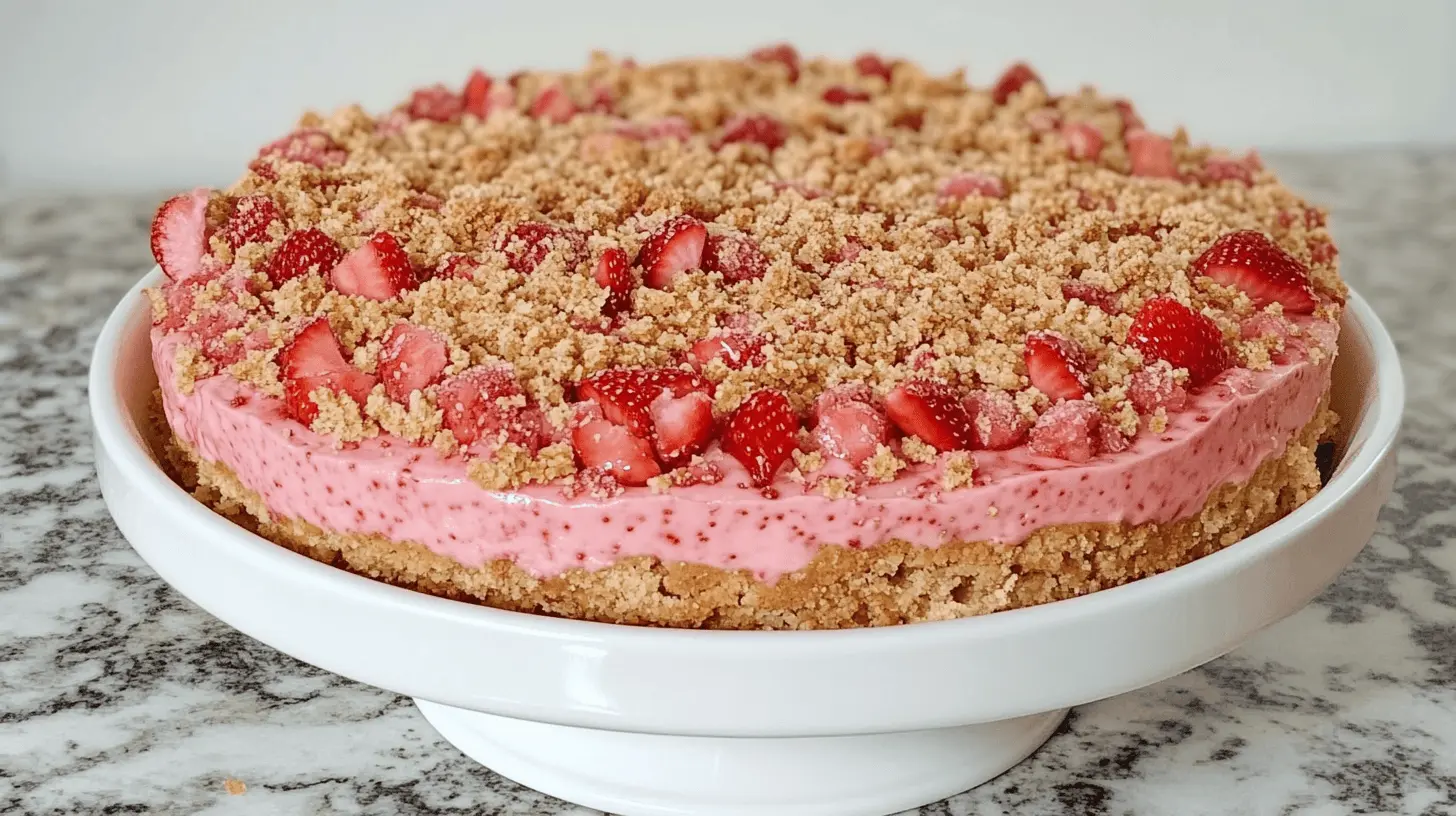
Strawberry Crunch Cheesecake is a no-bake dessert featuring a creamy cheesecake filling layered over a sweet cookie crust and topped with a strawberry shortcake-inspired crumble made from cookies and freeze-dried strawberries. It’s a nostalgic twist on traditional cheesecake, inspired by those iconic ice cream bars we all know and love.
Why “crunch”? Because the topping delivers a sweet, buttery bite that perfectly complements the smooth cheesecake underneath. Like they say—“Life is short, eat dessert first,” especially when it’s this good.
Why You’ll Love This Recipe
- No-Bake Simplicity – No oven, no problem. This dessert comes together with basic ingredients and a fridge.
- Creamy & Crunchy Contrast – A silky filling meets a golden, buttery topping that’s completely addictive.
- Nostalgic Flavor – Tastes like a strawberry shortcake ice cream bar in cheesecake form.
- Make-Ahead Friendly – Perfect for prepping the day before a party or event.
- Customizable – Swap the crust, add a swirl of jam, or switch up the toppings.
How to Make Strawberry Crunch Cheesecake
Quick Overview
This dessert is made in three simple parts: the crust, the cheesecake filling, and the strawberry crunch topping. The hardest part? Waiting for it to chill.
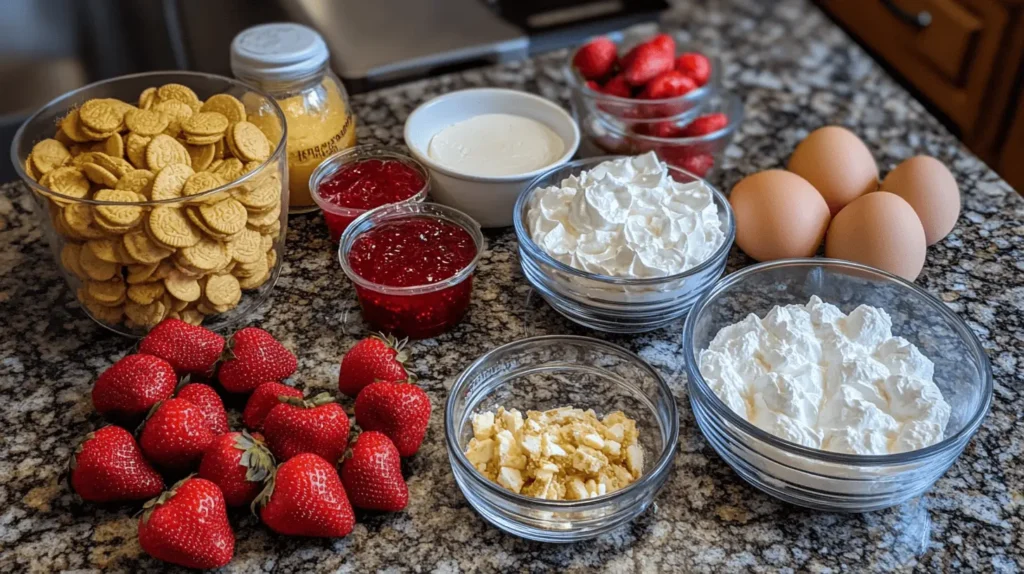
Key Ingredients
| Ingredient | Quantity | Preparation |
|---|---|---|
| Cream cheese (full-fat) | 16 oz (2 blocks) | Softened to room temp |
| Heavy cream | 1 cup | Cold, for whipping |
| Powdered sugar | ¾ cup | Sifted for smooth texture |
| Vanilla extract | 1 tsp | – |
| Golden Oreos or graham crackers | 2 cups | Crushed for crust |
| Unsalted butter | ½ cup (1 stick) | Melted |
| Freeze-dried strawberries | ⅓ cup | Crushed for topping |
| Golden Oreos (extra) | ⅔ cup | Crushed and mixed with berries |

Step-by-Step Instructions
Make the Crust
Crush your cookies or graham crackers until fine, then stir in melted butter until the mixture resembles wet sand. Press firmly into the bottom of a 9-inch springform pan and chill in the refrigerator while you prepare the filling.
Whip the Cream
In a large cold bowl, beat heavy cream to stiff peaks. This whipped cream adds lightness and structure to your no-bake cheesecake.
Make the Cheesecake Layer
Beat softened cream cheese and powdered sugar until smooth and creamy. Mix in vanilla extract, then gently fold in the whipped cream using a spatula until fully combined.
Assemble and Chill
Pour the cheesecake mixture over the crust and smooth the top. Cover and chill for at least 6 hours, preferably overnight, to set completely.
Make the Strawberry Crunch Topping
In a bowl, mix crushed freeze-dried strawberries with crushed Golden Oreos or vanilla cookies. Right before serving, sprinkle the topping generously over the chilled cheesecake.
What to Serve with Strawberry Crunch Cheesecake
Strawberry Crunch Cheesecake is a decadent dessert that easily stands on its own, but if you’re serving it as part of a larger spread, pairing it with the right sides and drinks can really round out your menu. Whether it’s for a weekend brunch, a holiday dessert table, or a casual get-together, these delicious recipes add just the right touch of contrast and variety.
Cinnamon Rolls with Heavy Cream – Soft, buttery, and dripping with sweet icing, these indulgent rolls are perfect for serving alongside cheesecake at a brunch or breakfast-for-dinner occasion.
Lemon Cookie Recipe – Bright and zesty, these cookies add a citrusy freshness that balances the rich, creamy layers of the cheesecake beautifully.
Pumpkin Banana Bread – Earthy and spiced, this moist loaf offers a warm flavor contrast that’s great for fall gatherings or any time you want something cozy.
Toasted Marshmallow Syrup – Drizzle this sweet syrup over cheesecake slices or add it to lattes for a fun dessert-inspired drink pairing.
Southwest Chicken Salad – Looking for something savory to balance the sweetness? This fresh, protein-packed salad is perfect if you’re serving the cheesecake as part of a lunch or brunch spread.
Pro Tips for Perfecting Strawberry Crunch Cheesecake
- Use room temp cream cheese – Ensures a silky, lump-free filling. Cold cream cheese is difficult to mix and can lead to a gritty texture. Let it soften at room temperature for about 30–45 minutes before beating for the smoothest result.
- Whip cream to stiff peaks – Under-whipping can lead to a soft, runny texture that won’t hold up once sliced. Use a cold mixing bowl and beat until peaks stand firm on their own. This gives your cheesecake that light, mousse-like consistency.
- Chill long enough – Let the cheesecake set for at least 6 hours or, better yet, overnight. Rushing this step can cause the filling to be too soft, especially when slicing or serving at room temperature.
- Add topping before serving – This keeps the crunch fresh and prevents sogginess. If added too early, the topping can absorb moisture and lose its signature texture. Wait until just before serving to sprinkle it on for maximum crunch.
- Use a hot knife to slice – Dip in hot water and wipe clean between cuts for picture-perfect slices. This technique glides through the cheesecake cleanly, preventing crumbles and preserving the topping.
- Want to amp it up? Try swirling in some strawberry jam before chilling or drizzling with melted white chocolate just before serving. You can also pipe on whipped cream rosettes or garnish with fresh strawberries for a bakery-style finish. If you love texture, consider folding crushed cookies or white chocolate chips into the filling for a fun surprise inside.
These thoughtful tips will help you create a Strawberry Crunch Cheesecake that’s not only beautiful to look at but also perfectly creamy, flavorful, and satisfying every time you make it.

How to Store and Serve
Refrigeration:
Store leftover cheesecake in an airtight container or tightly wrapped in the fridge for up to 5 days. The texture holds up beautifully, and the flavor even deepens slightly over time.
Freezing:
To freeze, wrap individual slices in plastic wrap, then foil. Place in a freezer-safe bag or container. Freeze for up to 1 month. Thaw in the fridge overnight before serving.
Serving Tips:
- Serve cold, straight from the fridge.
- For the best texture, add crunch topping just before serving.
- A dollop of whipped cream and fresh strawberries makes a perfect garnish.
FAQs About Strawberry Crunch Cheesecake
What is the difference between New York style cheesecake and regular cheesecake?
New York cheesecake is dense, rich, and baked with heavy cream and eggs. No-bake cheesecake like this one is light, fluffy, and set using whipped cream and chilling instead of baking.
How to order Strawberry Cheesecake at Starbucks?
Starbucks doesn’t officially offer this flavor, but you can order a Strawberries & Cream Frappuccino with a pump of white mocha and cinnamon dolce syrup for a cheesecake-inspired twist.
Will my no bake cheesecake set?
Yes, if you properly whip the cream and chill the cheesecake for at least 6 hours. Overnight chilling is best for firmness and clean slicing.
Does strawberry cheesecake ice cream have eggs?
It depends on the brand. Some premium ice creams use egg yolks in a custard base, while others do not. Check the ingredient list or recipe to be sure.
Why is my no bake cheesecake not firming up?
It may be due to under-whipped cream, warm cream cheese, or not enough chill time. Make sure your ingredients are cold and you chill the cake long enough for it to firm up properly.
Ready to make your own slice of strawberry bliss? This Strawberry Crunch Cheesecake is the no-bake dessert you didn’t know you needed but will be making again and again.
Print
Strawberry Crunch Cheesecake
- Total Time: 5 hours 35 minutes
- Yield: 12 slices 1x
Description
This Strawberry Crunch Cheesecake is a show-stopping dessert that combines creamy cheesecake, a golden Oreo crust, and a sweet strawberry crunch topping inspired by classic ice cream bars. It’s perfect for birthdays, holidays, or whenever you want to impress with a fruity, nostalgic treat.
Ingredients
For the Crust:
2 cups Golden Oreo crumbs (about 20 cookies)
5 tbsp melted butter
For the Cheesecake Filling:
3 (8 oz) packages cream cheese, softened
1 cup granulated sugar
3 large eggs
1/2 cup sour cream
1 tsp vanilla extract
1/4 cup strawberry preserves
Red or pink food coloring (optional)
For the Strawberry Crunch Topping:
1 cup Golden Oreo crumbs
1/2 cup freeze-dried strawberries, crushed
3 tbsp melted butter
Optional Topping:
Whipped cream
Fresh strawberries
Strawberry syrup
Instructions
1 Prepare the Crust
Preheat oven to 325°F (160°C)
Mix Oreo crumbs and melted butter in a bowl
Press mixture into the bottom of a 9-inch springform pan
Bake for 8–10 minutes, then set aside to cool
2 Make the Cheesecake Filling
In a large bowl, beat cream cheese until smooth
Add sugar and mix until creamy
Add eggs one at a time, mixing well after each
Stir in sour cream, vanilla, strawberry preserves, and food coloring if using
3 Bake the Cheesecake
Pour filling over the crust and smooth the top
Wrap the pan in foil and place it in a water bath
Bake for 60–70 minutes, or until center is just set
Turn off oven, crack the door, and let cheesecake cool for 1 hour
Refrigerate for at least 4 hours or overnight
4 Make the Strawberry Crunch Topping
Combine Oreo crumbs, crushed freeze-dried strawberries, and melted butter in a bowl
Mix until crumbly and evenly combined
5 Assemble and Serve
Sprinkle strawberry crunch topping over the chilled cheesecake
Add optional whipped cream, strawberries, or syrup before serving
Notes
For clean slices, use a hot knife wiped between cuts
Store leftovers covered in the fridge for up to 5 days
Crunch topping can be made in advance and stored at room temperature
- Prep Time: 25 minutes
- Chill Time: 4 hours
- Cook Time: 1 hour 10 minutes
- Category: Dessert
- Method: Baking
- Cuisine: American
Keywords: Strawberry Crunch Cheesecake, Golden Oreo Cheesecake, Strawberry Shortcake Cheesecake, Ice Cream Bar-Inspired Dessert

